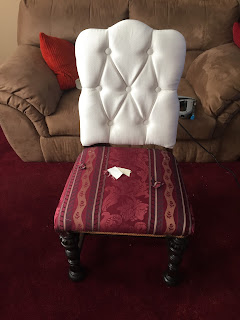
I have ALWAYS loved fabric dining room chairs. I think it adds an extra bit of elegance to the dining room. However, I was hit by reality when I saw how much they cost. A single chair like this one below ranges anywhere from $100-200! My husband and I recently bought our dining room table for $18 and restored it (see that
blog here)- so we felt a little silly spending $1000 on chairs when we spent less than $20 on our table. So, I thought I would try my hand at a little upholstering. After all, how hard could it be?
Haha, boy, was I in for the longest but most rewarding project to date! So here was my inspiration:
I found these beauties on - where else- craigslist. I got a set of 6 for $150. The foam and seats were in very good condition. The fabric was also in good condition- however, it wasn't the style I was looking for. The wood was a bit scratched, and could use some fixing.
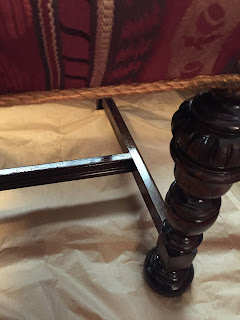
So, as always, I first started by sanding down the legs of the chairs. Unfortunately, do to it's great detail on the front two legs, I had to do a log of hand sanding- but in the end, it was smooth and scratch free. Then I stained it to match by dining room table
Then I added polyurethane on it- to protect it and give it a shine.
NEXT: Tackle the upholstering. I really wanted white tufted chairs... so I after a lot of research, my mother and I attempted our first tufted top chair. I covered buttons with my fabric with a kit from JoAnn's Fabric. One way to tuft (so we thought), is to pinch the fabric together to get it to make the diamond lines. However, the OCD in me did not like the way this chair turned out. It was hard to replicate, and each chair was looking slightly different than the first. I wanted it to be unified- and this way wasn't cutting it. So again, we stripped the chair fabric and started from scratch.
After more research. my husband proposed actually cutting the foam underneath so the fabric would have somewhere to sit when we tufted it. He also recommended added wood to the back of the chair so the buttons would have something to hold it's tension against
Doing it this way, I was able to create a mold so each chair could have the buttons and lines in the same exact spots (much more unified!). And adding the wood to the back allowed the buttons to push in farther to the back of the chair and stay there.
So after drawing the pattern I wanted, I used a heavy crafting knife to cut the holes (for the buttons) and the lines (for the fabric).
Then we drilled holes into the wood where the string for the button needed to go through.
I used heavy hemp like thread to thread the buttons through the chair and through the wood. Because there was a large hole where the drill was, I need to use something to stop the thread from just falling back through the hole. So I wrapped the thread through a button, and tied it off that way. This made button tight into the foam and helped force the fabric to tuft where we wanted it to.
As I placed the button, I would also grab the fabric and tuck it into the slots we cut out. This ensured I had enough fabric for each diamond tuft. After all the buttons were in and the fabric were in the proper creases, I stapled along the back of the chair.

This picture shows the previous tuft versus the new tuft

Then I attempted upholstering the bottom of the chairs. Some of the bottoms of the chair needed repair of it's base- I had to take the cushion off completely and restaple burlap webbing back into place. I then restapled the foam and batting down. Thankfully the foam and batting were in good condition for all the chairs so I simply reused them.
I used fabric tacks instead of staples for areas that would always be seen.
And then- I repeated and repeated and repeated!
For the BACK- there are probably a million better ways to do this. I couldn't use a tack strip because it's a straight metal rod- and my edges for the back were not straight. What would be the best thing to use is a flexible metal tack strip like
these, however, they are a bit expensive.
Instead, I had extra cardboard tack strip laying around in my house. I ripped and shaped the cardboard tack strip into the shape of the back of the chair and hot glue gunned it onto the fabric. I then folded the fabric over the tack strip as to create my hard edge. I then hot glue gunned the back onto the chair (again, not ideal- but it worked!). I sealed the seam with decorative tack strips.
Then I scotch guarded the whole thing- and they're ready to be used! (I still have a few left to finish, so photo with the chairs and table together to come!)


